TxTrikes | home
Shifter Installation Page 1 of 3
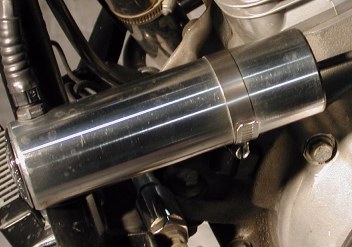
The Shift Solenoid
This is the Heart of our design. It is a dual action solenoid made by Kliktronic. It has a +/- 1.0" stroke with sufficient power to provide both the Up and Down shift action. Matching the travel requirements of the transmision shifter to the solenoid eliminates the need for any travel stops or dampeners. The following design has minimal mechanical parts, and has worked flawlessly since we installed it last year.
|
 |
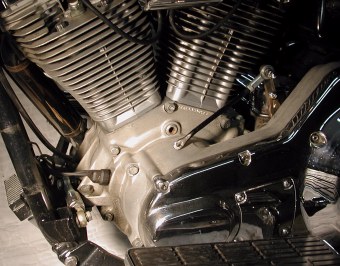
Remove the Original Shifter
The entire Toe Shift Mechanism has been removed including the toe shift, the cross shaft, and the stock linkage to the transmission shift lever. The port through the back of the side case where the cross shaft exited, was plugged and a solid Inspection Plate (the type used with forward controls) was added to dress up the face of the side case. We connect our shift solenoid directly to the transmission shift lever.
|
 |
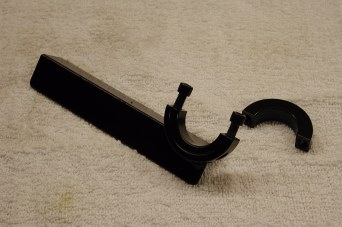 |
The Shift Solenoid Mounting Bracket
Our bracket is made to clamp onto the down tube of the motorcycle. This is a welded assembly made from a single split clamp and a six inch piece of 1 x 1x1/4 in. angle iron, It is sturdy enough to support the shifter solenoid without any additional brackets or supports. This particular unit fits a 1.25 inch Harley down tube. We powdercoated ours black.
|
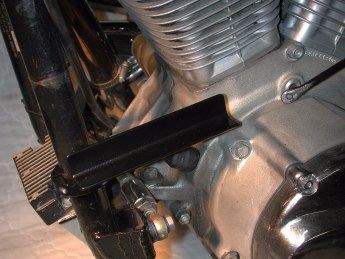
Mounting the Shifter Bracket
Mounting of the shifter bracket is simple - we simply bolt it directly to the down tube of the bike. It is located such that the line of the shifter solenoid shaft is tangent to the arc of the extended shift lever shown above. The shift linkage joins the shift lever with a Hiem Joint. It's swivel action eliminates the need for any special linkage guides.
Jump to
|
 |